














Shipping container homes have moved from fringe idea to mainstream solution. Affordable, durable, and eco-friendly, they’ve caught the attention of architects, DIY builders, and homeowners across the U.S.
But here’s the truth: the success of your container home starts with the container itself.
Buying the wrong unit—or skipping a proper inspection—can add thousands of dollars in unexpected costs later. This guide will walk you through every step you need to take before purchasing a container for your home project.
Before you buy a container:
Key decisions to make
Not all containers are created equal. Start with these two critical choices:
New (One-Trip) vs. Used: Which container is better for a home?
- One-Trip Containers (Essentially New):
- Only used once for international shipping.
- Clean, minimal wear, structurally sound.
- Higher upfront price ($3,500–$6,500 for 20ft–40ft).
- Best choice for residential builds, especially if resale value matters.
- Used Containers:
- Cheaper ($1,800–$3,800), but may have dents, rust, or prior chemical cargo.
- Suitable for non-habitable projects (storage, workshops).
- If used for housing, rigorous inspection is mandatory.
Recommendation: For homes, One-Trip is often worth the investment. It saves on repairs, cleaning, and structural reinforcement later.
Standard height vs. High cube (HC):
- Standard (8’6” tall): Cost-effective, common. But interior ceiling height is restrictive once insulation and flooring are added.
- High Cube (9’6” tall): Extra foot of headroom makes a big difference for livability. Costs ~10–15% more but gives much better interior comfort.
📐 For container homes, High Cube is almost always the smarter choice.

The Pre-purchase inspection checklist
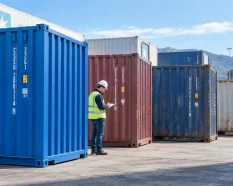
Never buy a container without a physical inspection (or verified third-party survey). Here’s what to look for:
Step 1:
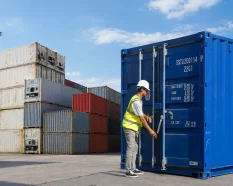
Check the doors, seals, and locking gear
- Doors should open and close smoothly.
- Rubber seals must be intact—cracks = future water leaks.
- Locking bars must align and latch properly.
- Red flag: Doors that stick or frame misalignment = potential warping.
Step 2:
Inspect the Floor for Damage and Chemicals
- Most container floors are marine-grade plywood treated with chemicals.
- Look for signs of rot, soft spots, or spillage stains.
- Ask about prior cargo: some chemicals may require replacement or encapsulation.
- Tip: If building a habitable space, budget for replacing or sealing the floor.
Step 3:
Look for dents, rust, and structural integrity
- Walk around the container. Look for:
- Major dents (especially on roof or corners).
- Rust patches—especially near door frame and lower rails.
- Bent corner castings (affects stacking and stability).
- Surface rust = manageable. Structural rust = deal-breaker.
Step 4:
The light test for leaks
- Stand inside during daylight, doors shut.
- Any ray of light = hole or gap.
- Common leak points: roof welds, corners, and near door seals.
- Leaks mean water damage and mold risk. Don’t skip this test.
Understanding container grades:
What does «Cargo-Worthy» really mean?
Suppliers often use grading terms. Here’s what they mean in practice:
| Grade | Meaning | Suitable For Homes? |
|---|---|---|
| New / One-Trip | Almost brand new, minimal wear | ✅ Best choice |
| Cargo-Worthy (CW) | Certified for export; structurally sound | ⚠️ Possible, but inspect carefully |
| Wind & Watertight (WWT) | Keeps out wind/rain; not certified for export | ⚠️ Risky unless budget is very tight |
| As-Is | No guarantees, damaged, or out-of-service | ❌ Never |
📦 For housing, stick to One-Trip or CW containers. WWT and As-Is are too risky.

Questions to ask your container supplier
Don’t just rely on visuals. Ask these specific questions before buying:
- What cargo was last carried?
- Is the container CSC certified?
- Has it been repaired? If so, where and how?
- Do you provide inspection reports or photos?
- What’s included in delivery—offloading, crane, placement?
- Are there guarantees against leaks or structural damage?
A reputable supplier like SILVERSEA Containers will answer these questions clearly and provide documentation.
The cost of cutting corners
Consider two scenarios:
- Cheap used container ($2,000): After repairs (rust treatment, door replacement, floor sealing, welding reinforcements), total costs may exceed $6,000–$8,000—not counting delays.
- One-trip container ($4,800): Higher upfront cost, but minimal repairs, longer lifespan, higher resale value.
💡 Over a 25-year home lifespan, the “expensive” choice often turns out cheaper.
Ready to find Your perfect container? Talk to an expert
Building your dream container home starts with choosing the right unit. By following this guide, you’ll avoid the most common—and costly—mistakes.
At SILVERSEA Containers, we specialize in:
✅ One-Trip and Cargo-Worthy containers ideal for homes
✅ Inspected and certified units with global delivery
✅ Expert advice for DIY builders, architects, and developers
👉 Request a container consultation
👉 Browse available stock
Buying a container for your home is not just about the cheapest box you can find. It’s about starting with a solid, safe, and suitable foundation for your future home.
With the right preparation—and the right partner—you can turn a steel box into the home of your dreams.